Need Specifications or a Quote?
Share your ventilation project requirements and our engineers will reply within 12 hours with technical specs, pricing, and lead time.

Ductwork is often hidden, but it controls how air moves through your home. Choosing the correct rectangular duct size is an important decision. It affects your airflow, energy bills, and comfort. Small mistakes in sizing lead to big problems like noise or high utility costs.
You must balance space limitations with airflow needs. A chart of common rectangular duct sizes is a good start. To get the best results, you need to understand air velocity, friction loss, and aspect ratio. Small changes to duct dimensions improve system efficiency and save you money.
This guide shows you how to design your rectangular ducts. We will cover basic ideas and show you how to apply them. You will find clear charts, step-by-step math, and industry standards to help you. With these concepts, you can make sure your HVAC system is quiet, efficient, and dependable.
Proper duct sizing is key to your HVAC system’s efficiency.
If your ducts are too small, the air moves too fast. This increases pressure and forces your system’s blower to work harder. The system uses more energy, which raises your operating costs. The strain also wears out equipment faster. High air speed creates noise, like whistling or roaring, from your vents.
If your ducts are too large, the air moves too slow. Conditioned air might not reach the rooms farthest away. This causes uneven temperatures and stuffy rooms. Incorrect sizing stops your HVAC system from heating, cooling, and ventilating your space correctly.
The aspect ratio of a rectangular duct is the ratio of its longer side to its shorter side. A 12-inch by 6-inch duct has an aspect ratio of 2:1. This number is important for airflow efficiency.
A square duct with a 1:1 aspect ratio is the ideal shape. It offers the least surface area for a specific cross-section. Less surface area means less friction as air moves through the duct. Lower friction reduces pressure loss and saves fan energy.
When the aspect ratio increases, the duct gets flatter. This adds more surface area and creates more friction. Try to design ducts with an aspect ratio between 1:1 and 2:1. Avoid ratios over 4:1 because they cause performance issues.
Choosing a low aspect ratio helps you create an energy-efficient system.
A duct sizing chart helps you find common rectangular duct sizes based on airflow. These tables list airflow in CFM (Cubic Feet per Minute) and air velocity in FPM (Feet Per Minute). The chart then gives you matching duct dimensions.
First, find the target CFM for your duct. Next, pick a velocity. Use a lower velocity for ducts near living spaces to keep noise down. Use a higher velocity for main ducts to improve efficiency. Match your CFM and chosen velocity on the chart to find duct sizes. Review the aspect ratio for each option to select the most efficient one that fits your space.
| Airflow (CFM) | Recommended Duct Sizes (Width x Height, inches) | Notes |
|---|---|---|
| 200 | 6×6, 8×4, 10×3 | Low-volume branch runs |
| 400 | 8×8, 10×6, 12×5 | Common for individual room supply |
| 600 | 10×9, 12×7, 14×6 | Medium branch runs or small zone trunks |
| 800 | 12×10, 14×8, 16×7 | |
| 1000 | 14×11, 16×9, 20×7 | Main trunk for a small residential system |
| 1200 | 16×12, 18×10, 20×9 | |
| 1600 | 18×14, 20×12, 24×10 | |
| 2000 | 20×16, 24×13, 28×11 | Main trunk for a large home or light commercial system |
This chart is a quick reference. You need precise calculations for a fully optimized system.
First, determine the volume of air each duct must carry. This is measured in Cubic Feet per Minute (CFM). A load calculation, like ACCA Manual J, gives you this value. The calculation looks at square footage, windows, insulation, and climate.
A general rule for homes is 400 CFM per ton of air conditioning. Commercial buildings often need 1.0 to 1.5 CFM per square foot. An accurate CFM target is the foundation for all your sizing decisions.
After you know the CFM, select an air velocity in Feet Per Minute (FPM). This choice is a trade-off between duct size, noise, and pressure. High velocity allows for smaller ducts but creates more noise and friction. Low velocity is quieter but needs larger ducts.
The best velocity depends on the duct’s location.
Choosing a velocity in these ranges helps balance cost and performance.
With CFM and FPM, you can calculate the required area of the duct.
Use this formula:
Required Area (square feet) = CFM / FPM
To get the area in square inches, multiply the result by 144.
Required Area (square inches) = (CFM / FPM) * 144
Here is an example.
A main duct needs to move 1,200 CFM at a velocity of 900 FPM.
The 16-inch by 12-inch duct is the most efficient choice because of its low aspect ratio. If you have limited ceiling height, the 24-inch by 8-inch duct might be your only choice.

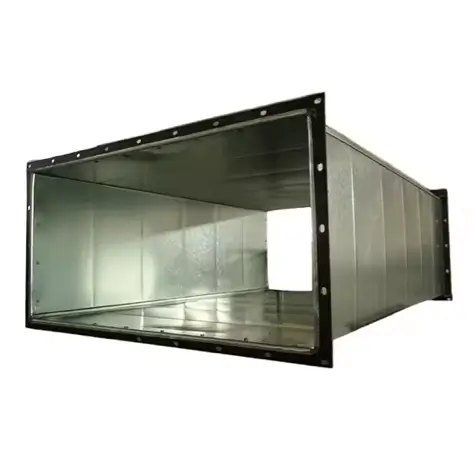
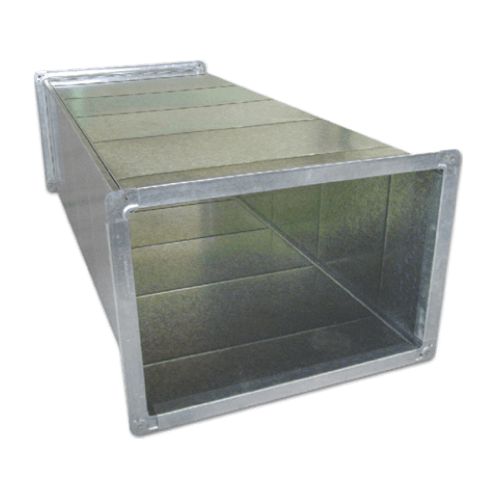
The main reason to choose rectangular ducts is to fit them into tight spaces. Their flat shape works well in narrow walls or above ceilings where height is limited. A 24-inch by 8-inch rectangular duct carries about the same air as a 16-inch round duct but uses half the vertical space.
Rectangular ducts are also flexible. It is often easy to connect branch ducts to them. This makes them a common choice for homes and small commercial buildings with structural limits.
Round ducts are better for airflow. A circle has the smallest perimeter for a specific area. This means less surface area touches the moving air. This shape creates much lower friction loss than a rectangular duct moving the same amount of air.
This efficiency gives you real benefits.
Space limits often prevent the use of round ducts.
Engineers use the idea of equivalent diameter to compare the two shapes. This calculation finds the diameter of a round duct that has the same friction as a rectangular duct. It allows you to use standard friction loss charts for rectangular duct systems.
The formula for equivalent diameter (De) is:
De = 1.30 x [ (Width x Height)^0.625 ] / [ (Width + Height)^0.250 ]
By converting a rectangular duct to its equivalent round size, you can model its performance accurately.
A rectangular duct’s strength depends on the thickness, or gauge, of its sheet metal. A lower gauge number means the metal is thicker and stronger. The correct gauge depends on the duct’s width and the system’s pressure. A wide duct needs thicker metal to stop it from bending or vibrating.
The Sheet Metal and Air Conditioning Contractors’ National Association (SMACNA) provides duct design standards. For example, SMACNA standards call for 26-gauge steel for ducts up to 12 inches wide. They require a heavier 22-gauge for ducts between 31 and 42 inches wide. Following these standards ensures your duct system is safe, airtight, and will last a long time.
For large rectangular ducts, the correct gauge is not enough to keep them stable. SMACNA standards also require specific reinforcement to hold the duct’s shape and prevent vibration. Good reinforcement reduces air leaks at joints, which is a major source of wasted energy.
Common ways to reinforce ducts include:
Following these standards ensures your ductwork is built to last.


